Mr. Coffee Maker Instructions

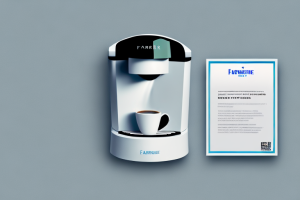
A coffee maker with its components labeled
If you’re a coffee drinker, then a great cup of Joe is an essential part of your daily routine. Enter the Mr. Coffee Maker — an appliance that can help you achieve a perfect brew, every time. Whether you’re looking for an easy-to-use option for your home or a high-tech coffee maker to impress your clients in the office, the Mr. Coffee Maker is a great choice for any java lover. In this article, we’ll take you through the step-by-step instructions on how to use and maintain your Mr. Coffee Maker, so you can enjoy great coffee every day.
Coffee Maker: What’s Included and How to Assemble It
Before you get started, let’s take a look at what comes inside the box when you purchase a Mr. Coffee Maker. Typically, you’ll get the coffee machine itself, a carafe to hold the brewed coffee, a filter basket, and a user manual. Once you have all the components, the next step is to assemble your coffee maker. Don’t worry; it’s pretty straightforward. Start by placing the filter basket onto the filter holder. Then, add a paper filter or reusable filter, depending on your preference. Once that’s done, put the carafe back in place and close the lid.
Now that you have assembled your coffee maker, it’s time to add water and coffee grounds. First, fill the carafe with cold water up to the desired level. Then, pour the water into the water reservoir of the coffee maker. Next, add the coffee grounds to the filter basket. The amount of coffee grounds you use will depend on how strong you like your coffee. Once you have added the coffee grounds, turn on the coffee maker and wait for it to brew your perfect cup of coffee.
It’s important to clean your coffee maker regularly to ensure that it continues to function properly and produce great-tasting coffee. To clean your coffee maker, start by unplugging it and letting it cool down. Then, remove the filter basket and wash it with warm, soapy water. Next, wipe down the exterior of the coffee maker with a damp cloth. Finally, run a cycle of water and vinegar through the coffee maker to remove any buildup or residue. With these simple steps, you can keep your coffee maker in great condition and enjoy delicious coffee every day.
Understanding the Different Parts of Your Mr. Coffee Maker
It’s a good idea to get familiar with the parts of your coffee maker before you start using it. Here are the different components you’ll find on your Mr. Coffee Maker:
- Water reservoir: This is where you pour the water that will be used to make the coffee.
- Coffee filter: This is where you place the coffee grounds so it can brew.
- Carafe: This is where the brewed coffee is stored.
- Heating plate: This keeps your coffee warm after it’s been brewed.
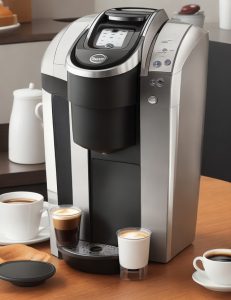
- Control panel: Depending on the model, this may come with different buttons and settings that allow you to set up the coffee maker the way you like it.
Now that you know where each part is, let’s move on to setting up and programming your coffee maker.
One important thing to keep in mind when using your Mr. Coffee Maker is the ratio of coffee to water. The general rule of thumb is to use one tablespoon of coffee grounds for every six ounces of water. However, you can adjust this ratio to your personal taste preferences.
Another useful feature of some Mr. Coffee Maker models is the ability to program the machine to start brewing at a specific time. This is especially helpful for those who like to have their coffee ready as soon as they wake up in the morning. Simply set the time and the machine will start brewing automatically.
How to Set Up and Program Your Mr. Coffee Maker
Before you brew your first pot of coffee, you’ll need to set up your Mr. Coffee Maker. Start by filling the water reservoir with water, making sure not to go past the max fill line. Then, add ground coffee to the filter basket. The amount of coffee you use depends on your preference, but typically it’s about one heaping tablespoon per cup of water. Once you’ve got the coffee in the basket, it’s time to start programming the coffee maker.
On the control panel, you’ll see different buttons that allow you to control the brewing process. You can set the time, program the auto-brew feature, and adjust the brew strength and temperature. Take your time reading the manual, and experiment with different settings to find your sweet spot. Once you’ve set up your coffee maker, it’s time to brew your first cup.
It’s important to note that the quality of your coffee will depend on the quality of your water and coffee beans. If your tap water has a strong taste or odor, consider using filtered or bottled water instead. Additionally, using freshly roasted and ground coffee beans will result in a better tasting cup of coffee. You can find high-quality coffee beans at specialty coffee shops or online retailers.
When it comes to cleaning your Mr. Coffee Maker, make sure to follow the manufacturer’s instructions. Regular cleaning will help prevent buildup of mineral deposits and coffee oils, which can affect the taste of your coffee. You can use a mixture of water and vinegar to clean the machine, or purchase a commercial coffee maker cleaner. It’s also a good idea to clean the carafe and filter basket after each use to prevent mold and bacteria growth.
Using the Auto-Brew Feature on Your Mr. Coffee Maker
The auto-brew feature on your Mr. Coffee Maker allows you to wake up to a freshly brewed pot of coffee without having to lift a finger. To use this feature, follow the steps below:
- Fill the water reservoir with water.
- Add ground coffee to the filter basket.
- Program the coffee maker to start brewing at the desired time.
- Make sure the carafe is in place and the lid is closed.
The next morning, you’ll wake up to freshly brewed coffee waiting for you. It’s just that easy.
It’s important to note that the auto-brew feature should only be used with freshly ground coffee beans. Using pre-ground coffee can result in a weaker and less flavorful cup of coffee. Additionally, make sure to clean your coffee maker regularly to ensure the best possible taste and performance.
Adjusting the Brew Strength and Temperature on Your Mr. Coffee Maker
If you like a stronger or weaker cup of coffee, you can adjust the brew strength to your liking. Your coffee maker should have a button or setting that allows you to adjust the strength. Generally, you can select regular, bold, or robust. The temperature can also be adjusted on some models, which is great if you prefer a hot or warm cup of coffee.
Another important factor to consider when adjusting the brew strength and temperature is the type of coffee beans you are using. Different types of beans have different optimal brewing temperatures and strengths. For example, lighter roasts typically require a higher temperature and shorter brewing time, while darker roasts require a lower temperature and longer brewing time.
It’s also worth noting that adjusting the brew strength and temperature can affect the overall flavor profile of your coffee. A stronger brew may result in a more bitter taste, while a weaker brew may be more acidic. Similarly, a hotter brew may bring out more subtle flavors, while a cooler brew may result in a milder taste.
Tips for Choosing the Right Coffee Beans for Your Mr. Coffee Maker
Your Mr. Coffee Maker can only do so much for your coffee’s taste — the quality of the beans you use also plays a big role. Here are some tips for choosing the right coffee beans for your coffee maker:
- Purchase freshly roasted beans.
- Make sure the beans are of high quality.
- Choose beans that are suited to your taste preferences.
- Grind the beans just before brewing for maximum flavor.
When it comes to choosing the right coffee beans for your Mr. Coffee Maker, it’s important to consider the roast level. Lighter roasts tend to have a more acidic and fruity flavor, while darker roasts have a bolder and more robust taste. If you prefer a milder coffee, go for a light roast, but if you like a stronger flavor, opt for a dark roast.
Another factor to consider is the origin of the beans. Different regions produce coffee beans with distinct flavors and aromas. For example, beans from South America tend to have a nutty and chocolatey taste, while beans from Africa have a fruity and floral flavor. Experiment with different origins to find the one that suits your taste buds best.
Maintaining Your Mr. Coffee Maker: Cleaning and Descaling
To keep your Mr. Coffee Maker in top condition, regular cleaning and descaling are essential. Descaling is the process of removing mineral buildup that can occur over time due to hard water. To descale your coffee maker, follow these steps:
- Fill the water reservoir halfway with white vinegar.
- Add water until the reservoir is full.
- Run the coffee maker through a brewing cycle.
- Discard the vinegar solution and run a cycle with pure water.
- Repeat as necessary until the mineral buildup is removed.
In addition to descaling, it’s also important to clean your coffee maker regularly. This includes wiping down the exterior, cleaning the filter basket and carafe, and running water through the machine to remove any leftover coffee residue.
Troubleshooting Common Issues with Your Mr. Coffee Maker
Despite proper maintenance, your Mr. Coffee Maker may encounter some issues from time to time. Here are some common problems and how to fix them:
- Machine won’t turn on: Check if the power cord is plugged in properly and if the outlet is working.
- Coffee tastes bad: Make sure you’re using fresh, high-quality beans, and clean your coffee maker regularly.
- Coffee leaks: Make sure the carafe is in place correctly, and the lid is closed properly.
How to Replace Parts on Your Mr. Coffee Maker
If you encounter any issues with your Mr. Coffee Maker, it may be necessary to replace certain parts. You can purchase replacement parts easily online or in-store. Some common parts that may need replacement include the carafe, filter basket, and heating plate. Follow the user manual for instruction on how to replace the parts.
Upgrading your Mr.Coffee maker: Accessories and Add-ons to Enhance Its Functionality
There are many accessories and add-ons available that can enhance the functionality of your Mr. Coffee Maker. For example, you can add a permanent filter to reduce waste and save money in the long run. You can also invest in a thermal carafe to keep your coffee hot for longer. Additionally, some models come with a frothing wand, which allows you to create delicious latte art at home.
Comparing Different Models of Mr.Coffee Makers to Find the Best One for You
Mr. Coffee Makers come in different models with various features and price points. Some popular models include the Mr. Coffee 12-Cup Programmable Coffee Maker, the Mr. Coffee Easy Measure 12-Cup Coffee Maker, and the Mr. Coffee One-Touch CoffeeHouse Espresso Maker. To choose the best one for you, consider your budget, lifestyle, and coffee preferences.
In conclusion, the Mr. Coffee Maker is a great appliance to have if you love coffee. With a little bit of practice, you’ll be able to make a perfect cup at any time of the day. Just remember to keep it clean, try a variety of coffee beans, and experiment with the settings until you find your perfect brew.


