Black+decker Coffee Maker How To Use

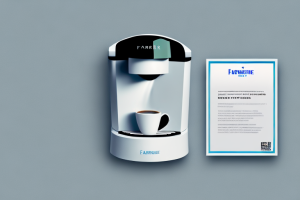
A black+decker coffee maker with the various components labeled
Welcome to our comprehensive guide on how to use the Black+decker Coffee Maker. In this article, we’ll take you through the unboxing process, help you understand the features of your coffee maker, guide you through preparing and measuring the coffee grounds, show you how to add water, walk you through powering up your coffee maker, setting the brewing options, programming the auto-brew feature, and maintaining your coffee maker with cleaning and descaling tips. We’ll also cover common troubleshooting issues and explain the accessories and replacement parts available for your coffee maker. So, grab a cup of coffee and let’s dive in!
Unboxing Your Black+decker Coffee Maker
The first step in using your Black+decker Coffee Maker is unboxing it. Make sure you have all the components that come with your coffee maker, including the glass carafe, removable filter basket, and the coffee maker itself. Remove all the packaging materials, including any stickers or plastic wrapping, and discard them properly.
Once you have unboxed your Black+decker Coffee Maker, it is important to clean all the components before using it for the first time. Wash the glass carafe, removable filter basket, and any other removable parts with warm soapy water and rinse thoroughly. Wipe down the exterior of the coffee maker with a damp cloth. This will ensure that your coffee maker is clean and ready to use, and will also help to remove any residual odors or flavors from the manufacturing process.
Understanding the Features of Your Black+decker Coffee Maker
The Black+decker Coffee Maker comes with a variety of features that make it easy to use and customize your coffee. Some of the features include a programmable auto-brew timer, brew strength selector, and a keep-warm function. Understanding these features will help you get the most out of your coffee maker.
In addition to these features, the Black+decker Coffee Maker also has a removable filter basket for easy cleaning and a water level indicator to ensure you add the right amount of water for your desired amount of coffee. The machine also has a pause-and-serve function, allowing you to pour a cup of coffee mid-brew without making a mess. By taking advantage of all these features, you can enjoy a perfectly customized cup of coffee every time.
Preparing and Measuring the Coffee Grounds for Your Coffee Maker
The next step in using your coffee maker is to prepare and measure your coffee grounds. The best coffee comes from freshly roasted beans that are ground just before brewing. Use a coffee grinder to grind your beans to the correct consistency, then measure out the desired amount of coffee. A general rule of thumb is to use one tablespoon of coffee for every six ounces of water. Add the coffee to the filter basket.
It’s important to note that the quality of your water can also affect the taste of your coffee. If your tap water has a strong taste or odor, consider using filtered or bottled water instead. Additionally, the temperature of the water can impact the brewing process. Ideally, the water should be between 195-205°F (90-96°C) for optimal extraction. Once you’ve added the water to the coffee maker, wait for the brewing process to finish before pouring and enjoying your freshly brewed coffee.
Water Level Indicators: How to Add Water to Your Coffee Maker
Adding the correct amount of water to your coffee maker is essential to brewing a delicious cup of coffee. The Black+decker Coffee Maker comes with water level indicators on the side of the machine, making it easy to add the right amount of water for your brew. Simply fill the carafe with the right amount of water and pour it into the water reservoir on the back of the machine.
It is important to note that overfilling the water reservoir can cause the coffee maker to malfunction and potentially damage the machine. Always make sure to fill the reservoir only up to the maximum water level indicator line. Additionally, if you are using filtered water, make sure to pour it into the reservoir before turning on the machine to ensure the water is properly filtered before brewing your coffee.
Powering Up Your Black+decker Coffee Maker
Once you’ve added the water and coffee, it’s time to power up your coffee maker. Plug the machine into an outlet and turn it on. The power button is located on the front of the machine. Once the machine is powered up, it will begin brewing your coffee.
It’s important to note that the brewing process may take a few minutes, depending on the amount of coffee you’re making and the strength you prefer. While the coffee is brewing, avoid opening the lid or removing the carafe, as this can disrupt the brewing process and affect the taste of your coffee. Once the brewing is complete, the machine will automatically turn off. You can then pour yourself a hot cup of coffee and enjoy!
Setting the Brewing Options: Strength, Temperature, and Brew Time
One of the great features of the Black+decker Coffee Maker is the ability to customize your brew. You can choose the strength of your coffee, the brewing temperature, and the brew time. Simply press the desired button on the control panel to adjust the setting. The machine will remember your preferences for future brews.
Additionally, the Black+decker Coffee Maker also has a programmable feature that allows you to set a specific time for your coffee to start brewing. This is perfect for those early mornings when you want to wake up to the smell of freshly brewed coffee. Simply set the time on the control panel and the machine will automatically start brewing at the designated time.
Programming the Auto-Brew Feature on Your Coffee Maker
If you want to wake up to the smell of fresh coffee, the programmable auto-brew feature is perfect for you. This feature allows you to set a time for your coffee maker to start brewing automatically. Simply program the time you want your coffee to start brewing, and the machine will automatically turn on and begin brewing your coffee.
One important thing to keep in mind when programming the auto-brew feature is to make sure that you have enough water and coffee grounds in the machine before setting the timer. If you forget to add these ingredients, the machine will turn on but won’t be able to brew your coffee.
Another useful tip is to experiment with different coffee-to-water ratios to find the perfect strength for your taste. You can adjust the amount of coffee grounds you add to the filter to make your coffee stronger or weaker. Once you find the perfect ratio, you can program it into the auto-brew feature and enjoy your perfect cup of coffee every morning without any extra effort.
Maintaining Your Black+decker Coffee Maker: Cleaning and Descaling Tips
To keep your coffee maker in top condition, it’s essential to clean and descale it regularly. The Black+decker Coffee Maker comes with a removable filter basket and a glass carafe that can both be easily cleaned with soap and water. The machine also has a descaling function which should be used every three to six months to remove mineral build-up and ensure that your coffee maker continues to brew delicious coffee.
In addition to regular cleaning and descaling, it’s important to use high-quality coffee beans and filtered water in your Black+decker Coffee Maker. Using low-quality beans or tap water can affect the taste of your coffee and cause build-up in the machine. It’s also recommended to avoid leaving coffee in the carafe for extended periods of time, as this can lead to staining and affect the flavor of future brews. By following these tips, you can ensure that your Black+decker Coffee Maker produces consistently great coffee for years to come.
Troubleshooting Common Issues with Your Coffee Maker
If you encounter any issues with your Black+decker Coffee Maker, don’t worry, there are solutions available. Some common issues include the machine not turning on, the coffee not brewing properly, or the machine leaking water. Consult the user manual or contact customer support for troubleshooting tips and solutions.
One additional tip for troubleshooting your coffee maker is to check the water reservoir. If the reservoir is not filled to the appropriate level, the machine may not function properly. Additionally, if the reservoir is not cleaned regularly, it can lead to clogs and other issues. Make sure to follow the manufacturer’s instructions for cleaning and maintaining your coffee maker to ensure it continues to function properly.
Accessories and Replacement Parts Available for your Black+decker Coffee Maker
In addition to the coffee maker itself, Black+decker offers a range of accessories and replacement parts to enhance your coffee-making experience. These include replacement glass carafes, reusable coffee filters, and thermal carafes to keep your coffee hot for longer. Check out the Black+decker website for a full range of accessories and replacement parts.
With this guide, you should be able to easily use your Black+decker Coffee Maker to brew delicious coffee every time. Remember to clean and maintain your coffee maker regularly to ensure that it continues to brew excellent coffee for years to come.
One of the most popular accessories for the Black+decker Coffee Maker is the travel mug. This mug is designed to fit perfectly under the coffee maker’s spout, allowing you to brew your coffee directly into the mug. It’s perfect for those who are always on the go and need their coffee fix while commuting to work or running errands. The travel mug is made of durable materials and is easy to clean, making it a great addition to your coffee-making routine.


